Animal shading drawing is the foundational skill that transforms a flat animal outline into a three-dimensional, lifelike piece of wildlife art. Every professional pencil artist, digital illustrator, and wildlife sketch enthusiast relies on tonal rendering to create depth, volume, and believable surface texture in their creature drawings.
Whether you are working on a detailed lion portrait, a delicate hummingbird study, or a textured reptile sketch, mastering animal pencil shading techniques is what separates a basic outline from artwork that truly feels alive.
According to the Art of Education University’s 2024 State of Art Education Survey, which gathered responses from over 1,700 art educators, roughly 90% of teachers reported feeling most confident teaching two-dimensional mediums like drawing and painting making pencil-based animal shading one of the most widely taught and practiced art skills globally.
This guide walks you through every essential technique, tool, and step-by-step method you need to take your animal tonal drawing from beginner level to professional quality.
Table of Contents
Why Animal Shading Drawing Matters for Every Artist
Shading does far more than make a sketch look “finished.” When applied correctly to animal artwork, tonal rendering solves three critical visual problems simultaneously.
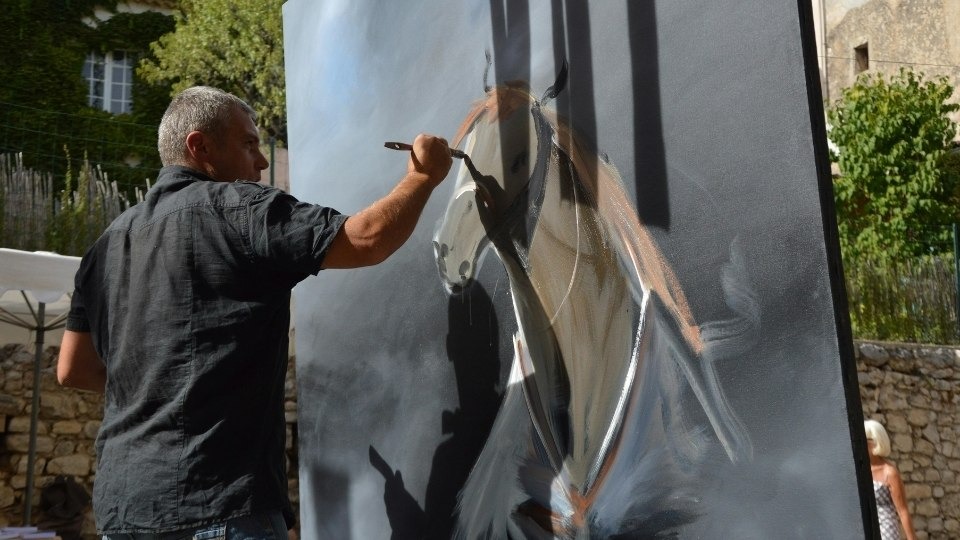
First, it communicates form and body volume turning circles and ovals into a horse’s rounded barrel chest or a cat’s curved skull. Second, it establishes a consistent light source, anchoring the drawing in a believable visual space. Third, it replicates the unique surface texture of different animals from the wiry bristles of a boar to the silky sheen of a wet otter.
Drawing educator Andrew Loomis, whose instructional book Drawing the Head and Hands has shaped generations of fine artists, emphasized that understanding how light wraps around curved surfaces is the single most essential skill in all realistic figure and creature illustration.
Without shading, even a perfectly proportioned animal sketch remains visually flat. With it, the drawing gains dimensionality that pulls viewers in.
Understanding the 5 Tonal Zones in Animal Shading
Before touching pencil to paper, every realistic animal drawing begins with understanding five distinct tonal zones. This value framework forms the backbone of all professional shading work whether traditional or digital.
| Tonal Zone | Role in Animal Shading | Typical Placement on Animal Forms |
| Highlight | Brightest area nearest the light source | Top of the skull, wet nose, glossy eyes |
| Light Tone | Receives direct but softer illumination | Upper back, forehead, top of the muzzle |
| Mid-Tone | Transitional bridge between light and shadow | Sides of the body, cheek area, mid-flank |
| Core Shadow | Deepest dark where light fails to reach | Under the belly, beneath the jaw, inner legs |
| Reflected Light | Subtle bounce from nearby surfaces | Lower edge of core shadow, ground-side rim |
This five-value system is taught as a mandatory foundational exercise at The Watts Atelier of the Arts, one of the most respected classical drawing academies in the United States. Their structured curriculum treats tonal zone mapping as a prerequisite before students advance to any texture or detail work.
Understanding these zones before starting any animal sketch shading prevents the two most common beginner errors: guessing where shadows fall and applying tone randomly without a tonal plan.
Best Tools and Materials for Animal Pencil Shading
Choosing the right materials has a direct impact on the quality of your pencil shading for animals. Different mediums suit different textures, styles, and skill levels.
Graphite Pencils The Essential Starting Point
Graphite remains the most popular and versatile medium for animal shading artwork because it offers unmatched tonal control. The grading scale runs from 9H (extremely hard, very pale) to 9B (extremely soft, richly dark).
Faber-Castell, in their professional drawing product guidelines, recommends that realistic animal artists work primarily in the 2B to 6B range for the majority of their shadow and texture work, reserving harder grades like HB and 2H for highlight areas and initial layout sketching.
| Pencil Grade | Best Use in Animal Shading | Tonal Zone Covered |
| 2H – H | Light layout lines, subtle highlights | Highlight, light tone |
| HB | Base tone establishment, general mid-work | Light tone, mid-tone |
| 2B – 4B | Primary fur strokes, mid-tone shadows | Mid-tone, core shadow |
| 6B – 8B | Deep core shadows, maximum dark contrast | Core shadow, cast shadow |
Charcoal Bold Dramatic Wildlife Studies
Vine and compressed charcoal enable faster, broader tonal coverage, making them well-suited for large-scale animal studies and dramatic wildlife compositions. General’s Charcoal, widely used across fine art programs in North America, produces both vine and compressed varieties that blend smoothly and respond well to kneaded eraser lifting a technique essential for restoring highlights in fur and feather shading.
Coloured Pencils Layered Texture Rendering
Brands like Prismacolor Premier and Faber-Castell Polychromos are favored by professional illustrators for coloured pencil animal shading because their soft wax and oil cores allow deep layering and burnishing the process of building multiple colour passes to create vibrant, lifelike fur and plumage tones.
Digital Tools Modern Animal Illustration Workflow
Drawing tablets from Wacom and iPads running Procreate have become standard platforms in professional wildlife illustration. According to Wikipedia’s documentation on Procreate, the app became the overall best-selling iPad application in 2018 and continues to dominate the digital art space. A 2023 Future Market Insights survey found that approximately 32% of artists worldwide now use digital tools as part of their creative workflow.
Procreate’s built-in brush library includes dedicated fur, fine hair, and textured pencil brushes that replicate traditional graphite strokes with remarkable fidelity making it a natural bridge for traditional animal artists transitioning to digital rendering.
How to Prepare Your Animal Sketch Before Shading
Every successful animal shading drawing starts with a properly structured base sketch. Jumping straight into tonal work without this preparation is the most common reason beginner drawings fall apart.
Step 1 Block In Geometric Foundation Shapes
Every animal body can be simplified into basic geometric forms: spheres for the head, cylinders for limbs, and oval or egg shapes for the torso. Artists trained in the academic tradition including those following the Bargue Drawing Course method developed at the prestigious École des Beaux-Arts consistently begin with this reductive geometry before adding any surface detail or tonal work.
Step 2 Establish and Mark the Light Source
Decide whether your light comes from above, the side, or behind and mark the direction lightly on your paper. Every shadow, mid-tone, and highlight you add later must remain consistent with this single decision.
Stan Prokopenko of Proko.com, whose figure drawing and anatomy courses have reached over two million subscribers on YouTube, identifies inconsistent light direction as the most frequent structural error in beginner animal tonal drawings.
Step 3 Map the Shadow Boundaries
Before applying any tone, lightly sketch the boundary line between your light and shadow regions directly on the animal’s form. This “shadow map” acts as your roadmap for all subsequent shading work.
New Masters Academy, an online classical art education platform used by thousands of professional illustrators, teaches shadow boundary mapping as a mandatory planning step in its animal drawing curriculum no tonal mark-making begins until this map is complete.
6 Core Animal Shading Techniques Every Artist Needs
Different animal surfaces demand different approaches to pencil rendering and tonal blending. Here are the six most effective methods used by professional wildlife illustrators.
1. Hatching and Cross-Hatching
Hatching builds tone through closely spaced parallel lines. Cross-hatching adds a second set of lines at an intersecting angle, creating richer, denser shadow areas particularly effective for rough-textured surfaces like reptile scales, rhinoceros hide, and elephant skin.
Artist and educator Alphonso Dunn, author of Pen and Ink Drawing: A Simple Guide and host of a YouTube channel with over 600,000 subscribers, demonstrates cross-hatching as the primary tonal construction tool in his widely followed drawing tutorials.
2. Contour Shading
Rather than applying flat parallel lines, contour shading follows the curved surface of the animal’s body. Lines arc around forms wrapping over a horse’s barrel chest or curving along a bear’s rounded shoulder. This technique communicates volume far more convincingly than flat hatching alone.
The Florence Academy of Art, one of Europe’s leading classical realism institutions, teaches contour shading as a core observational drawing skill.
3. Blending and Smudging
Blending uses a stump, tortillon, or fingertip to smooth pencil marks into seamless tonal gradients. This method works best for short-haired animals like horses, deer, and big cats, where the coat has a sleek, continuous quality.
Betty Edwards, in her landmark instructional text Drawing on the Right Side of the Brain, which has sold over five million copies worldwide, argues that perceiving and replicating subtle tonal gradients is the most transferable skill in all representational drawing.
4. Stippling
Stippling constructs tone entirely through clusters of tiny dots the denser the concentration, the darker the perceived area. While slower than other methods, it produces a beautifully organic texture ideal for rough animal surfaces like elephant skin, toad hide, and Komodo dragon scales.
Scientific illustrators working for institutions like the Smithsonian National Museum of Natural History frequently use stippling for biological specimen drawings where precise tonal accuracy and fine surface detail are equally critical.
5. The Fur-Stroke Method
This is the most essential technique in animal fur shading. Instead of filling areas with broad tonal blocks, you draw individual short strokes that follow the direction, length, and weight of actual fur. Each stroke must taper at the end reducing pressure as you lift to replicate the natural pointed tip of a real hair.
Alphonso Dunn identifies directional stroke control as the defining difference between artists who produce convincing animal texture drawing and those whose work remains technically accurate but visually lifeless.
6. Eraser Lifting for Highlights
Shaping a kneaded eraser to a fine point and gently lifting graphite along the brightest edges creates individual highlight hairs the ridge of the skull, the top of the spine, or a rim-lit contour in backlit compositions. Hyperrealist pencil artist Paul Cadden identifies this eraser-lifting step as the technique that separates competent shading from genuinely photorealistic results.
How to Shade Animal Fur: Step-by-Step Process
Shading realistic animal fur with pencil requires a layered approach that builds from dark foundations to fine surface detail.
- Establish the base shadow layer Using a 4B or 6B pencil, fill core shadow areas with smooth, directional strokes that follow the fur’s natural growth direction. Work lightly at first; darkness can always be added but is difficult to remove without damaging the paper surface.
- Build mid-tones with layered strokes Switch to a 2B pencil and add medium-pressure fur strokes across transitional mid-tone areas. Work outward from shadow boundaries, allowing strokes to gradually thin as they approach light zones. Stroke density not pressure alone controls mid-tone depth, a distinction emphasized throughout Proko’s pencil shading course.
- Apply light fur strokes across highlight zones Using an HB or H pencil, add fine, feathery strokes in the brightest areas. These should be thinner and more widely spaced than shadow-zone strokes. This layering principle mirrors methods used by professional natural history illustrators at the Natural History Museum, London.
- Lift individual highlight hairs with a kneaded eraser Shape the eraser to a fine point and gently pull graphite away along the brightest edges to create the illusion of individual illuminated hairs catching the light.
How to Shade Feathers, Scales, and Smooth Skin
Different animal surfaces require distinct shading approaches for animal textures. One technique does not fit all creatures.
| Animal Surface | Recommended Technique | Key Pencil Range | Common Mistake to Avoid |
| Long fur (bears, wolves) | Dense layered fur-strokes | 4B – 6B | Single-direction strokes across entire body |
| Short fur (horses, deer) | Smooth blending + muscle highlights | HB – 4B | Losing sharp muscle edge definition |
| Flight feathers (birds) | Structural quill-outward hatching | HB – 2B | Uniform pressure with no feather separation |
| Body plumage (birds) | Loose fur-stroke method | 2B – 4B | Treating soft body feathers like rigid flight feathers |
| Reptile scales | Cross-hatching with minimal blending | 2B – 4B | Over-blending between individual scale edges |
| Fish scales | Smooth blending + lifted elliptical highlights | HB – 2H | Creating flat, non-reflective surfaces |
| Elephant / rhino skin | Heavy stippling + coarse blending | 4B – 8B | Insufficient shadow depth in wrinkle crevices |
Shading Bird Feathers
Bird feathers present a unique challenge because a single feather contains two visually distinct zones: the smooth structured outer vane and the soft downy base near the body. For primary flight feathers, use controlled hatching strokes radiating outward from the central quill. Darken the lower margin where each feather overlaps the one beneath to create clear visual separation.
The Cornell Lab of Ornithology’s Birds of the World illustration archive employs professional wildlife artists who consistently demonstrate this dual-technique approach across all commissioned bird plates making it an invaluable visual reference for bird feather drawing shading.
Shading Reptile and Fish Scales
Reptile scales are rigid, geometric structures that catch light independently. Cross-hatching between scale edges combined with a blended mid-tone across each scale surface creates the hard, compartmentalized look of snake, lizard, and crocodilian skin. The Reptile Database provides high-resolution scale photography across thousands of species a valuable free reference library for studying reptile scale drawing technique.
Fish scales are the opposite: smooth, rounded, and highly reflective. Blend seamless mid-tones across the body, then use a kneaded eraser to lift small elliptical highlight shapes arranged in overlapping rows directly mimicking real fish scale structure.
Common Animal Shading Mistakes and How to Fix Them
Even experienced artists fall into habitual errors when shading wildlife subjects. Recognizing these patterns accelerates improvement dramatically.
| Mistake | Root Cause | Corrective Action |
| Flat, chalky shadows | No tonal range established | Use full range from 6B darks to 2H lights |
| Muddy, undefined fur texture | Blending over fur strokes | Blend base tone only; keep top strokes sharp |
| Inconsistent shadows across body | No defined light source | Mark light direction before first shading stroke |
| No volume or three-dimensionality | Missing reflected light zone | Add subtle light tone along lower shadow edge |
| Stiff, uniform-looking fur | Same stroke direction everywhere | Follow actual hair growth direction per body zone |
| Overworked, damaged paper surface | Too many erasing passes | Work light-to-dark; use eraser only for final highlights |
Stan Prokopenko consistently advises students to spend the first five minutes of any animal shading session on light-source planning and shadow mapping a small upfront investment that prevents the majority of these downstream errors.
Digital Animal Shading Drawing: Tools and Workflow
Digital animal shading follows identical tonal principles to traditional pencil work but executes them through layered brush strokes on a pressure-sensitive tablet.
Procreate and Clip Studio Paint are the two most widely used platforms for professional digital wildlife illustration. Procreate became the overall best-selling iPad app in 2018, according to its Wikipedia page, and continues to dominate with over 200 built-in brushes and a dedicated fur and fine hair brush set.
The digital fur-stroke workflow mirrors the traditional approach precisely:
- Base layer Fill shadow zones with a mid-dark base tone using a textured round brush
- Mid-tone layer Add directional fur strokes on a separate layer using multiply blend mode
- Highlight layer Apply light fur strokes on a new layer set to normal or screen mode
- Detail layer Use Procreate’s “Fine Hair” or “Fur” brush for individual strand-level refinement
- Lift highlights Use the eraser tool with a tapered brush tip to recover bright highlight hairs
According to a 2023 Future Market Insights report, digital artists now constitute approximately 43% of the global illustration app market a figure that continues to grow as tablet hardware becomes more accessible and powerful.
Structured Practice Exercises for Animal Shading Improvement
Learning it accelerates dramatically when practice is structured rather than open-ended. Stan Prokopenko, founder of Proko.com, consistently advocates for isolated drills over full compositions during the skill-building phase.
Exercise 1 Single fur patch study: Shade a 5 cm square of fur in one direction, focusing entirely on stroke taper and tonal range. Practice 15 minutes daily for one week.
Exercise 2 Single feather study: Draw and shade one isolated primary feather from a reference photo using Unsplash’s free bird photography library. Repeat five times before attempting a full wing.
Exercise 3 Nine-step value scale strip: Draw a nine-box strip from white to black using only pencil strokes no blending to calibrate tonal control. Proko’s free value scale tutorial walks through this exercise step by step.
Exercise 4 Animal eye study: Shade a single animal eye in full detail, including highlight, iris texture, and wet surface reflection. Eyes are the most technically demanding single element in realistic animal portrait drawing.
Exercise 5 Full animal study from reference: Attempt this only after completing the four isolated exercises above. Pixabay’s free wildlife photo library provides thousands of high-resolution animal references at no cost.
Research from drawing communities including r/learnart on Reddit consistently shows that artists who practice structured shading exercises for 20 to 30 minutes daily report visible improvement within four to eight weeks.
Animal Shading Drawing: Keyword Cluster and Related Topics
For artists and content creators looking to deepen their knowledge across the full topic, here are the key related subjects worth exploring:
| Related Topic | Search Intent | Connection to Animal Shading |
| How to shade animal fur with pencil | Step-by-step tutorial | Core subtopic fur-stroke method |
| Bird feather drawing shading techniques | Technique-specific guide | Specialized feather hatching approach |
| Reptile scale drawing technique | Texture-specific guide | Cross-hatching for rigid geometric surfaces |
| Best pencils for animal drawing | Product comparison | Tool selection directly affects tonal range |
| Digital animal illustration tutorial | Platform-specific workflow | Procreate/Clip Studio Paint shading layers |
| Realistic animal portrait drawing tips | Advanced composition advice | Full application of all shading methods |
| Animal anatomy for artists | Structural foundation | Correct proportions underpin convincing shading |
| Pencil shading techniques for beginners | Entry-level skill building | Foundational tonal control exercises |
Each of these subtopics feeds directly into and supports mastery of animal shading drawing as a whole. Building knowledge across this cluster rather than focusing on a single technique in isolation is what develops genuine topical expertise.
Conclusion: Shading Transforms Animal Drawings from Flat to Alive
Every realistic animal drawing from a graphite wolf portrait to a digital eagle study rendered in Procreate is built on the same fundamental framework: understanding how light interacts with curved forms, committing to tonal values before adding surface texture, and selecting the right shading technique for each specific animal surface.
The five-zone tonal system gives you structure. Mapping your light source before the first shading stroke gives you consistency. The fur-stroke method, feather hatching approach, stippling technique for rough skin, and blending method for sleek coats these are not advanced skills reserved for professionals. They are learnable fundamentals that any artist at any level can develop through deliberate, structured repetition.
As Betty Edwards wrote in Drawing on the Right Side of the Brain, the barrier to realistic drawing is almost never physical ability it is the habit of drawing symbols rather than what the eye actually sees. Animal shading drawing forces you to observe tonal reality rather than assumed shapes, and that perceptual shift is what transforms every sketch into a fully realized portrait.
Start today: Choose one wildlife reference photograph from Unsplash and spend 20 minutes shading only the core shadow zone using a 4B pencil nothing else. This single isolated drill, used as a daily warm-up by professional illustrators, trains your eye to read tonal structure faster than any full drawing session.
If this guide helped sharpen your animal shading techniques, share it with a fellow artist working on their wildlife drawings. Drop a comment below and tell us which animal you are tackling first we would love to follow your progress.
Q1: What is the best pencil grade for animal fur shading?
The 4B pencil is widely regarded as the most versatile single option for animal fur shading because it delivers rich shadow tones while remaining controllable for precise directional strokes. Most professional wildlife pencil artists maintain a working set spanning 2H to 6B for complete tonal flexibility.Faber-Castell’s professional drawing guidelines recommend building a minimum five-pencil set 2H, HB, 2B, 4B, and 6B to cover every tonal zone in animal shading work.
Q2: How do I make animal fur look realistic in a pencil drawing?
Convincing fur requires two elements working in parallel: correct tonal values distributed across all five tonal zones, and individual strokes that consistently follow the actual direction of hair growth on each body section. Start by establishing dark base tones with a 4B, then layer progressively lighter strokes on top, lifting the pencil at the end of each mark to create natural taper.Proko’s pencil shading tutorials demonstrate this layered approach in free video format.
Q3: Can beginners learn animal shading without formal art classes?
Yes the structured fundamentals of animal shading drawing are fully learnable through self-directed study using resources likeAndrew Loomis instructional books,Proko.com video courses, and platform-based instruction onSkillshare andUdemy. The most effective self-teaching strategy combines isolated practice exercises single fur patches, individual feathers, value scale strips before attempting full animal compositions.
Q4: What paper surface works best for detailed animal pencil shading?
Smooth Bristol board is the preferred surface for highly detailed animal fur and feather drawing because its tight tooth allows precise, controlled pencil strokes without unwanted paper grain interference.Strathmore’s 300 Series Bristol andCanson XL Bristol are the two most widely recommended options among professional pencil portrait artists. Medium-texture cartridge paper suits general animal shading practice, while rough watercolour paper is better reserved for charcoal-based wildlife studies.
Q5: How is digital animal shading different from traditional pencil shading?
Digital animal shading follows the same tonal principles five value zones, directional fur strokes, lifted highlights but executes them through layered brush work on a pressure-sensitive tablet rather than physical pencil strokes on paper. Software likeProcreate andClip Studio Paint includes dedicated fur and hair brushes that closely replicate traditional graphite stroke quality, making the transition between mediums smoother than many artists expect.
Q6: How long does it realistically take to improve at animal shading drawing?
Most artists who practice structured animal shading exercises consistently 20 to 30 minutes daily report visible, meaningful improvement within four to eight weeks, based on widely shared timelines across drawing communities includingr/learnart on Reddit and theProko community forum. Improvement accelerates significantly when practice targets isolated elements rather than full animal portraits during the foundational learning period.