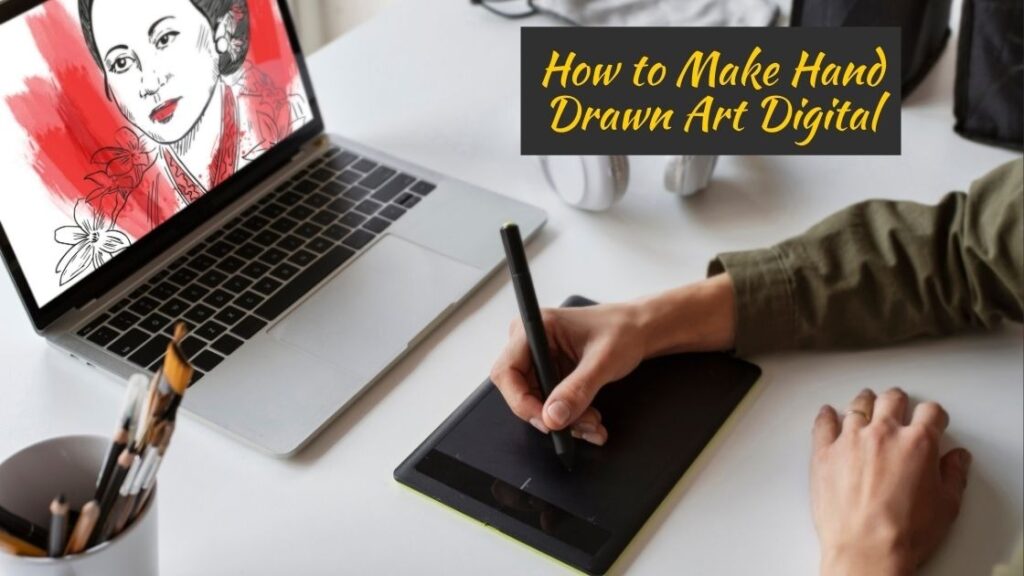
If you have ever wondered how to make hand drawn art digital, you are not alone thousands of artists and creators search for this exact answer every day. There is something magical about a pencil sketch or an ink illustration, but the real power comes when you bring that artwork into the digital world. Whether you want to digitize hand drawn illustrations for print, sell them online, or use them in graphic design projects, knowing the right process makes all the difference. In this guide, we will walk you through professional techniques, essential scanning methods, and the best digital art software to transform your traditional sketches into clean, scalable, and stunning vector artwork that looks polished and professional.
The truth is, turning physical art into digital files is no longer reserved for experts with expensive equipment. Today, anyone with a basic scanner or even a smartphone camera can start the journey. However, the difference between an amateur result and a professional-quality output lies in the techniques and tools you choose. From adjusting levels and contrast in Adobe Photoshop to converting your sketches into crisp vectors using Illustrator, every step matters when you want to make hand drawn art digital the right way.
Throughout this article, you will discover a complete step-by-step workflow that covers everything from preparing your original artwork and choosing the best scanning settings to refining your digital files with industry-standard editing software. We have also included practical tips that professional illustrators use daily, so you can avoid common mistakes and achieve gallery-ready results on your very first try. By the end, you will have the confidence and knowledge to digitize any hand drawn piece like a true professional.
Why Every Artist Should Learn How to Make Hand Drawn Art Digital
The shift from traditional to digital art is one of the biggest movements in the creative industry today. Learning how to make hand drawn art digital is no longer optional for artists who want to stay competitive. Digital files are easier to share, edit, reproduce, and sell across multiple platforms. Whether you are a freelance illustrator, a hobbyist, or a professional designer, understanding this process opens doors to endless opportunities. The demand for digitized illustrations continues to grow in areas like merchandise design, branding, book publishing, and social media content creation.
A Brief Background on Digitizing Traditional Art
Artists have been converting physical artwork into digital formats since the early days of desktop publishing in the 1980s. Back then, the process required expensive flatbed scanners and specialized software that only studios could afford. Today, the technology is accessible to everyone. Modern tools and apps have simplified the workflow dramatically, making it possible for anyone to learn how to make hand drawn art digital from the comfort of their home. This shift has democratized the creative field and empowered independent artists worldwide.
Everything You Need Before Learning How to Make Hand Drawn Art Digital
Before diving into the actual process of how to make hand drawn art digital, it is important to gather the right tools and prepare your workspace. Having everything ready ensures a smooth and efficient workflow from start to finish.
Essential Tools and Software
You do not need a massive budget to get started. Here are the core tools most professionals rely on:
- A high resolution flatbed scanner or a smartphone with a quality camera
- Adobe Photoshop for raster image editing and color correction
- Adobe Illustrator for converting sketches into clean vector graphics
- A graphics tablet like Wacom for detailed touch ups and refinements
- Cloud storage or an external drive for organizing and backing up your files
Preparing Your Original Artwork
The quality of your final digital file heavily depends on how well you prepare the original piece. Use clean white paper and dark ink or pencil lines for the best contrast. Avoid smudges, wrinkles, or stains on your artwork because these imperfections will show up during scanning. If your sketch is light, go over the lines again to make them bolder. Proper preparation is a crucial first step when learning how to make hand drawn art digital with professional results.
Step by Step Process on How to Make Hand Drawn Art Digital Like a Pro
This is the core workflow that professionals follow every time they need to make hand drawn art digital. Each step builds on the previous one, so follow them in order for the best outcome.
Step 1: Scanning Your Artwork
Place your artwork face down on a flatbed scanner and scan it at a minimum of 300 DPI. For artwork that you plan to print in large formats, scan at 600 DPI or higher. DPI stands for dots per inch, and a higher value captures more detail from your original piece. If you do not own a scanner, apps like Adobe Scan or CamScanner can work as alternatives, though a dedicated scanner always delivers superior results when you want to make hand drawn art digital professionally.
Step 2: Cleaning Up the Scan in Photoshop
Once you have your scanned image, open it in Adobe Photoshop. The first thing you should do is adjust the brightness and contrast using the Levels tool. This step removes the grey background of the paper and makes your lines sharp and defined. Use the Eraser tool to clean up any dust spots, smudges, or unwanted marks. You can also use the Threshold adjustment to convert your image into pure black and white, which is especially useful for ink drawings. This cleanup phase is essential in the process of how to make hand drawn art digital because it determines the clarity of your final output.
Step 3: Converting to Vector Format
For artists who need scalable artwork, converting your cleaned scan into a vector file is the next logical step. Open your image in Adobe Illustrator and use the Image Trace function. This tool automatically converts your raster image into editable vector paths. You can adjust the settings for threshold, corners, and noise to get the cleanest result. Once traced, click Expand to finalize the vector conversion. Now your hand drawn art is fully digital and can be resized to any dimension without losing quality.
Step 4: Adding Color and Final Details
After vectorizing, you can bring your artwork to life by adding color. Use the Live Paint Bucket tool in Illustrator to fill enclosed areas with color quickly. Alternatively, you can take the file back into Photoshop and use layers to paint digitally with brushes that mimic traditional media like watercolor or acrylic textures. This stage is where your creativity truly shines, and it is often the most enjoyable part of learning how to make hand drawn art digital.
Pro Tips on How to Make Hand Drawn Art Digital With Professional Quality
Knowing how to make hand drawn art digital is one thing, but achieving professional quality requires attention to detail. Here are some practical tips that experienced illustrators swear by:
- Always work in CMYK color mode if your art is intended for print production
- Save your files in multiple formats like PNG, TIFF, and SVG for versatility
- Use non destructive editing techniques such as adjustment layers and smart objects
- Keep your original scan untouched as a backup in case you need to start over
- Zoom in to 200% or more during cleanup to catch small imperfections you might miss
How to Make Hand Drawn Art Digital Without Facing These Common Challenges
Even with the right tools, artists sometimes face difficulties when they try to make hand drawn art digital. One of the most common issues is losing the organic feel of the original sketch during the vectorization process. To avoid this, reduce the smoothing settings in Image Trace so the software preserves the natural texture of your lines. Another challenge is color matching, where the digital version looks different from the original. Calibrating your monitor and working in the correct color profile solves this problem effectively.
Learning how to make hand drawn art digital takes practice, but with each project you complete, the process becomes faster and more intuitive. The key is to experiment with different settings, trust the workflow, and never be afraid to undo and try again.
Conclusion
Bringing your traditional artwork into the digital space is one of the most valuable skills you can develop as a modern artist or designer. Throughout this guide, we have covered everything you need to know about how to make hand drawn art digital, from preparing your original sketches and scanning them at the right DPI settings to cleaning up your files in professional editing software and exporting them in the perfect format. Each step in this workflow plays a critical role in ensuring your final output looks sharp, clean, and ready for any creative application.
Whether you are a freelance illustrator looking to sell digital prints, a graphic designer building a portfolio, or a hobbyist who simply wants to preserve and share beautiful sketches online, mastering the art of digitization gives you a serious creative advantage. The tools available today, from Adobe Photoshop and Illustrator to free alternatives like GIMP and Inkscape, make it easier than ever to transform pencil and ink drawings into stunning digital files that stand out.
Remember, the key to success lies in starting with a clean drawing, scanning at high resolution, and taking time to refine your work using layers and proper editing techniques. The more you practice this process, the faster and more confident you will become. So grab your favorite sketchbook, fire up your scanner, and start turning your hand drawn art digital today. Your next masterpiece is just a scan away.